

阅
VScode + WSL打造生产力工具
VScode作为一款轻量强大的编辑器,win结合WSL以及官方插件能搭建一个非常好的工作环境。
VScode美化配置
插件
VScode的官方插件非常强大,想要VScode满足接下来的配置需求以及达到更好的美化效果,我们先要挑选一些非常好的官方插件。
Chinese (Simplified)Language Pack for Visual Studio Code #中文语言包
Remote-WSL #用于远程连接WSL
topper
Guides
Code Runner
File Peek
Path Intellisense
String Manipulation
用户设置
{
    "window.zoomLevel": 1,
    "files.autoSave": "afterDelay",
    "files.autoSaveDelay": 10000,
    "explorer.confirmDragAndDrop": false,
    "git.ignoreLegacyWarning": true,
    "editor.lineHeight": 20,
    "editor.fontSize": 18,
    "editor.wordWrap": "on",
    "editor.formatOnSave": true,
    "python.linting.flake8Enabled": true,
    "python.linting.enabled": false,
    //启用flake8,首先需要pip3 install flake8
    "python.formatting.provider": "yapf", ///启用yapf,首先需要pip3 install yapf
    "path-intellisense.autoSlashAfterDirectory": true,
    "path-intellisense.extensionOnImport": true, // 配色方案
    "python.linting.pylintArgs": [
        "--load-plugins",
        "pylint_django",
        "--disable-msg=C0111"
    ], // 忽略的警告信息
    // 下面是topper的插入header配置
    "topper.customTemplateParameters": [
        {
            "personalProfile": {
                "author": "Jason",
                "website": "bulbasaur.github.bitbucket.yababbdadado.com",
                "copyright": "None \n None",
                "license": "None",
                "email": "GP01214618541@163.com"
            }
        },
        {
            "officeProfile": {
                "author": "John Doe",
                "department": "Product Development",
                "email": "john.doe@doejohn.com"
            }
        }
    ],
    "topper.headerTemplates": [
        {
            "defaultCStyled": {
                "headerBegin": "/**",
                "headerPrefix": "*",
                "headerEnd": "*/",
                "template": [
                    "${headerBegin}",
                    "${headerPrefix} ${fileName}",
                    "${headerPrefix} @author ${author}",
                    "${headerPrefix} @description ${description}",
                    "${headerPrefix} @created ${createdDate}",
                    "${headerPrefix} @copyright ${copyright}",
                    "${headerPrefix} @last-modified ${lastModifiedDate}",
                    "${headerEnd}"
                ]
            }
        },
        {
            "python": {
                "headerBegin": "# -*- coding: utf-8 -*-",
                "headerPrefix": "#",
                "headerEnd": "#",
                "template": [
                    "${headerBegin}",
                    "${headerPrefix} ${fileName}",
                    "${headerPrefix} @author ${author}",
                    "${headerPrefix} @description ${description}",
                    "${headerPrefix} @created ${createdDate}",
                    "${headerPrefix} @last-modified ${lastModifiedDate}",
                    "${headerEnd}"
                ]
            }
        }
    ],
    "editor.fontFamily": "monospace",
    "terminal.integrated.fontFamily": "Consolas",
    "editor.fontWeight": "500",
    "latex-workshop.view.pdf.viewer": "external",
    "vsicons.dontShowNewVersionMessage": true,
    "latex-workshop.message.update.show": false,
    "workbench.colorTheme": "Monokai",
    "editor.tabCompletion": "on",
    "extensions.closeExtensionDetailsOnViewChange": true,
    "terminal.integrated.cursorStyle": "line",
    "editor.renderIndentGuides": false,
}
LaTeX工作环境
在做这一步前,先确保WSL中已经安装好了Texlive的相关组件。
接下来安装一个官方插件Latex Workshop
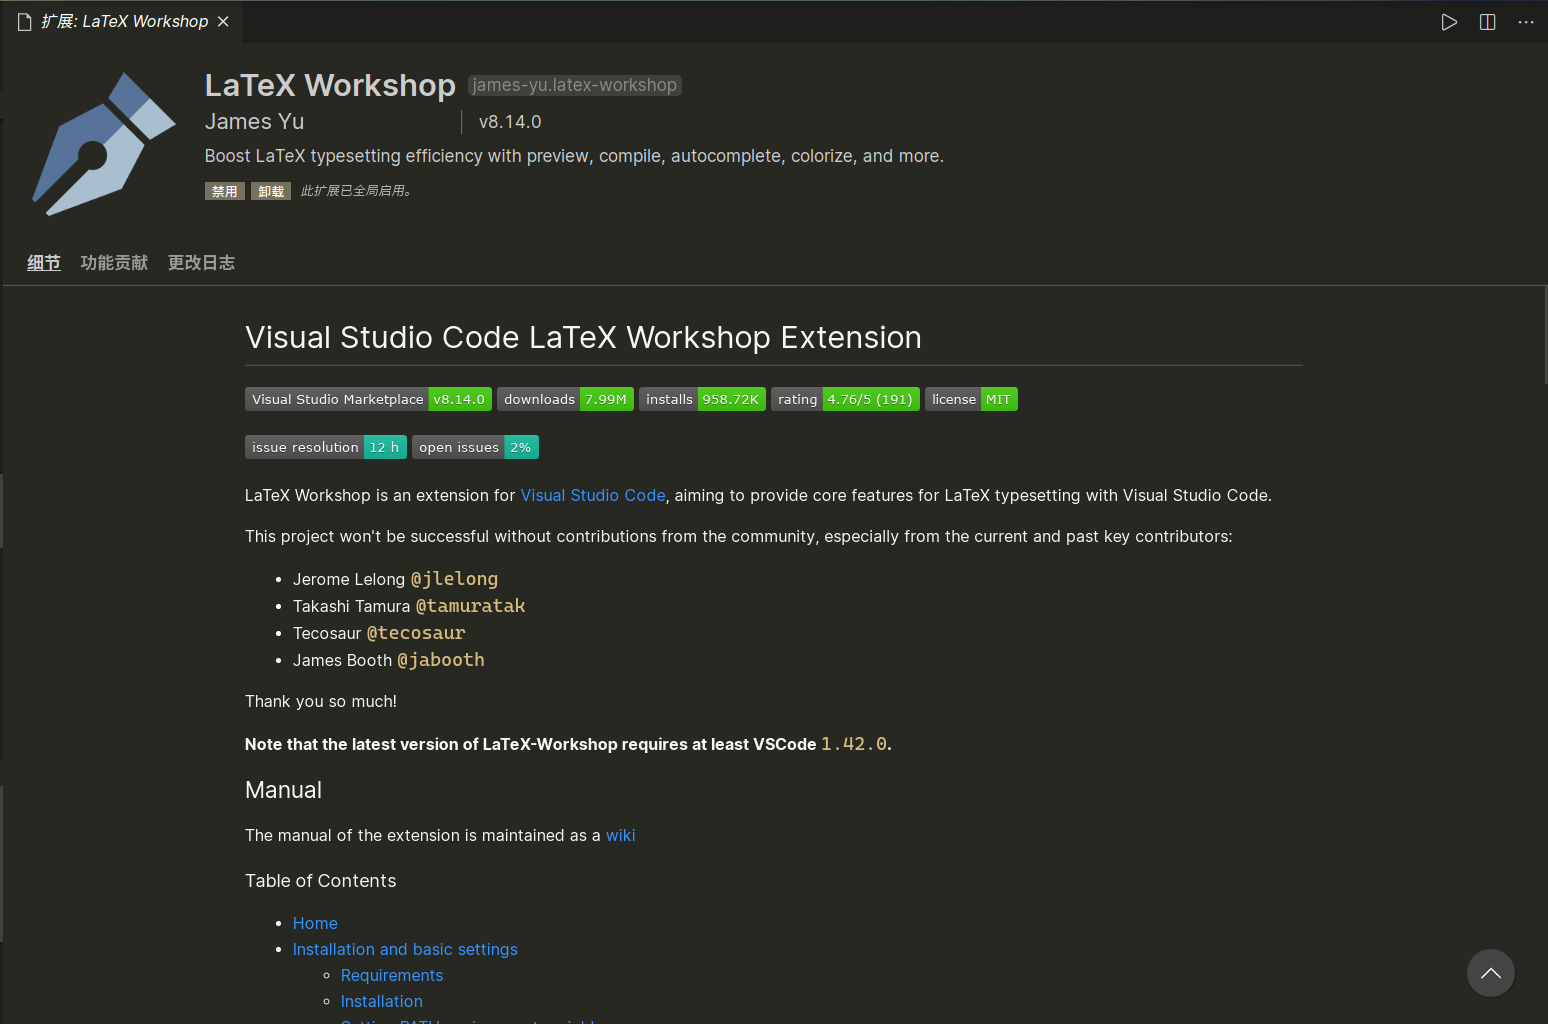
然后在工作区中添加如下配置:
settings.json
{
    "latex-workshop.latex.recipes": [
        {
            "name": "xelatex",
            "tools": [
                "xelatex"
            ]
        },
        {
            "name": "xelatex->bibtex->exlatex*2",
            "tools": [
                "xelatex",
                "bibtex",
                "xelatex",
                "xelatex"
            ]
        }
    ],
    "latex-workshop.latex.tools": [
        {
            "name": "xelatex",
            "command": "xelatex",
            "args": [
                "-synctex=1",
                "-interaction=nonstopmode",
                "-file-line-error",
                "%DOCFILE%"
            ]
        },
        {
            "name": "bibtex",
            "command": "bibtex",
            "args": [
                "%DOCFILE%"
            ]
        }
    ],
}
C/C++工作环境
虽然可以直接用vim,不过编辑器毕竟也有诸多好处,这边就把编辑器的配置提上来:
首先需要安装C/C++插件:
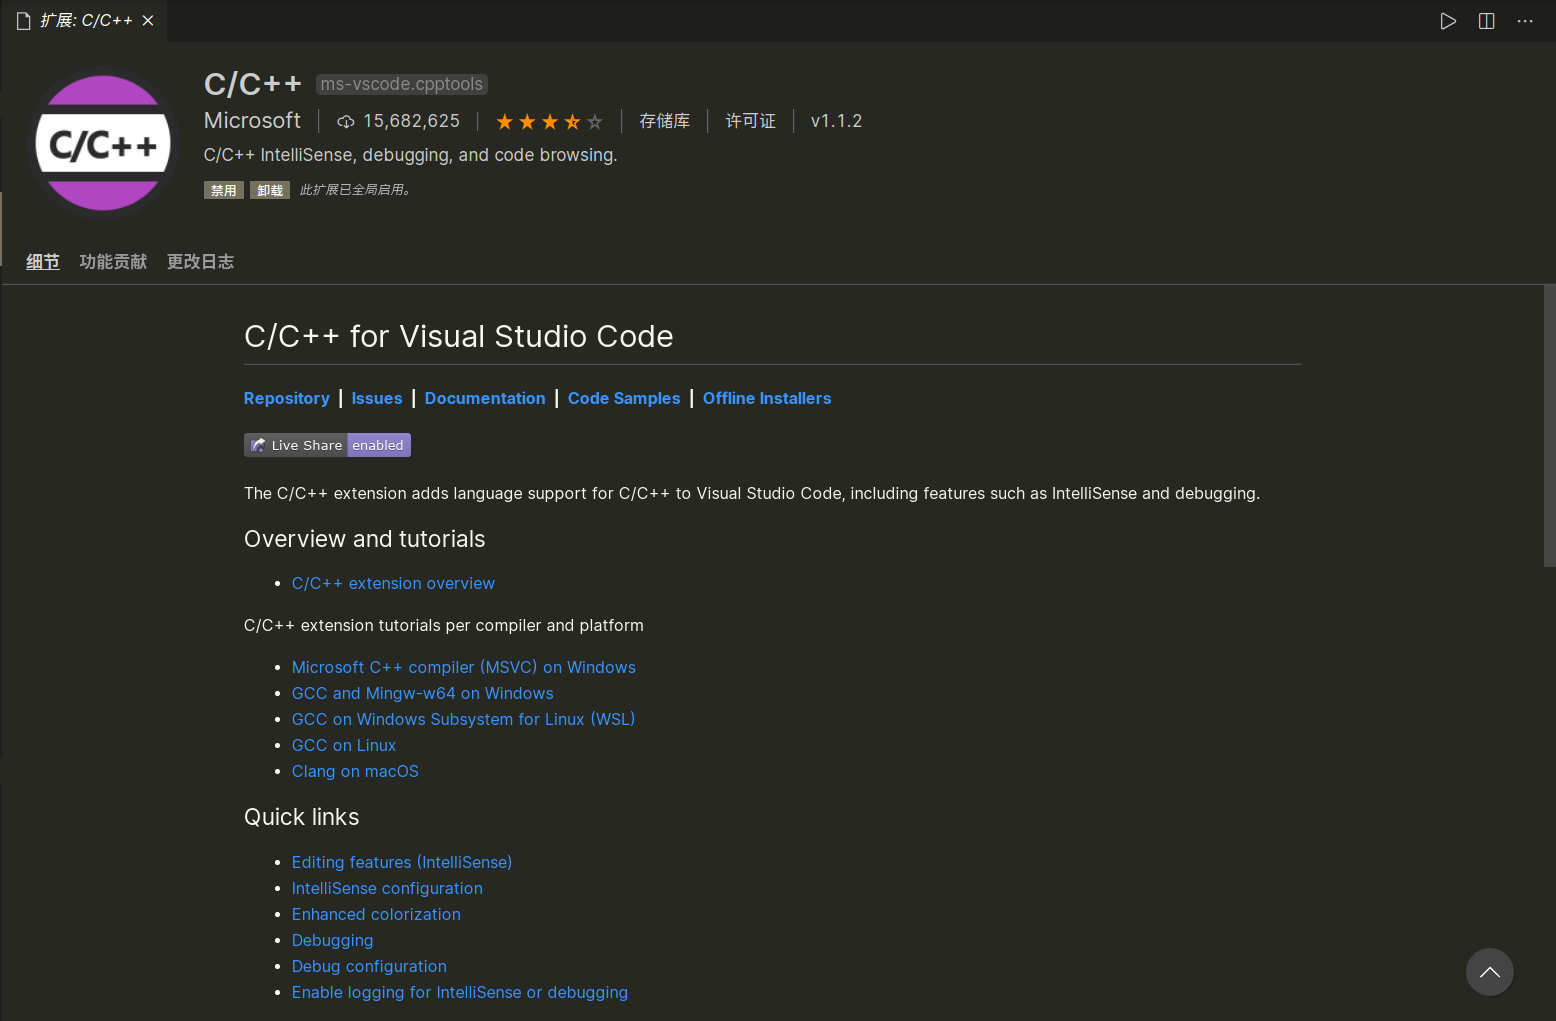
接下来打开一个工作区文件夹,新建.vscode文件夹,添加如下三个文件:
tasks.json
{
    "version": "2.0.0",
    "tasks": [
        {
            "type": "shell",
            "label": "g++ build active file",
            "command": "/usr/bin/g++",
            "args": [
                "-g",
                "${file}",
                "-o",
                "${fileDirname}/${fileBasenameNoExtension}"
            ],
            "options": {
                "cwd": "/usr/bin"
            },
            "problemMatcher": [
                "$gcc"
            ],
            "group": {
                "kind": "build",
                "isDefault": true
            }
        }
    ]
}
launch.json
{
    "version": "0.2.0",
    "configurations": [
        {
            "name": "g++ build and debug active file",
            "type": "cppdbg",
            "request": "launch",
            "program": "${fileDirname}/${fileBasenameNoExtension}",
            "args": [],
            "stopAtEntry": false,
            "cwd": "${workspaceFolder}",
            "environment": [],
            "externalConsole": false,
            "MIMode": "gdb",
            "setupCommands": [
                {
                    "description": "Enable pretty-printing for gdb",
                    "text": "-enable-pretty-printing",
                    "ignoreFailures": true
                }
            ],
            "preLaunchTask": "g++ build active file",
            "miDebuggerPath": "/usr/bin/gdb"
        }
    ]
}
c_cpp_properties.json
{
    "configurations": [
        {
            "name": "Linux",
            "includePath": [
                "${workspaceFolder}/**"
            ],
            "defines": [],
            "compilerPath": "/usr/bin/gcc",
            "cStandard": "c11",
            "cppStandard": "c++17",
            "intelliSenseMode": "clang-x64"
        }
    ],
    "version": 4
}
那么接下来就可以编辑一下hello world测试一下咯。
Python
python比较简单,只需要安装一个Python插件:
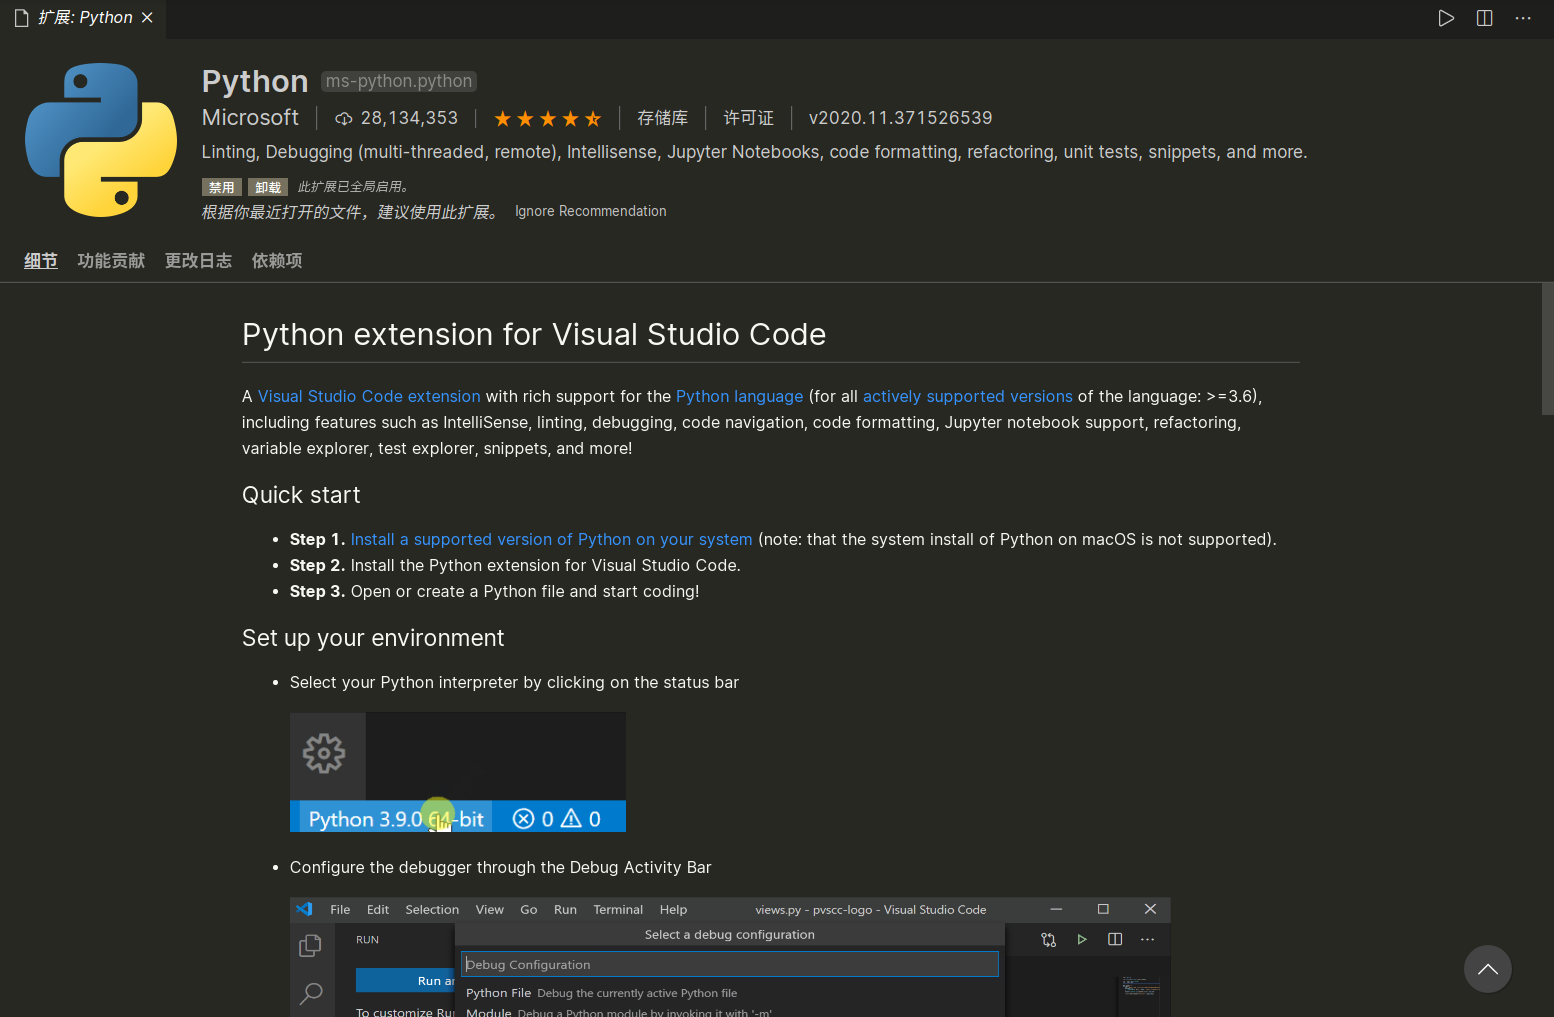
然后在工作区中加入如下配置即可:
settings.json
{
    "python.pythonPath": "/usr/sbin/python",
}